Eichler Paint Colors, Eichler Stains, Mid Century Modern Home Paint Tips
We’ve often received questions about painting Eichlers, so I thought it would be handy to post some notes on things to consider when planning out your new paint job.
Eichler Paint Color Selection
While there is an original Eichler color palette available, it’s difficult to limit anyone to those original colors from 1950’s. Times have changed, and so has the enormous selection of colors available so why restrict anyone from exploring their creative freedom?
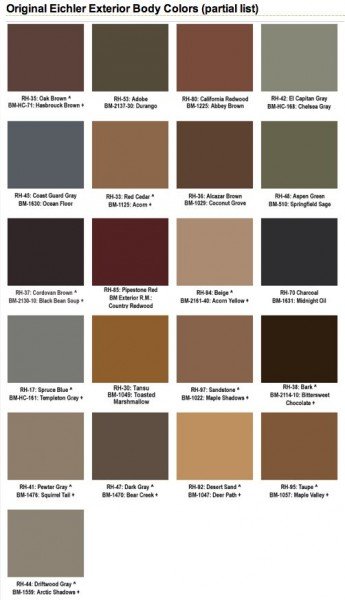
But, if you’d like to remain true to the era, you can choose from swatches translated by Eichler paint experts (as appeared on Eichler Network).
The Eichler Design Philosophy
Let’s first back up and have a look at the overall visual aesthetics intended from the architects that help build these wonderful homes. Just like a concept car, renderings can look very cool from design concepts exaggerated by the artists, but by the time it makes it to production, the cars can look different, but maintain the theme.
Eichler had some key design and living concepts that the architects embraced:
Bring the outdoors in - create an appearance that you’re living without walls (eg - floor to ceiling windows)
Retreat to your own world - after you enter the home, it’s as if you walked into your own paradise. The experience of a flowing indoor-outdoor living begins. Intentionally designed with very few windows facing the street, it’s a completely different idea to not care too much for what’s going on in the front of the house (eg - Let’s ignore when neighbors are coming and going).
How to Visualize Your Eichler Paint Scheme
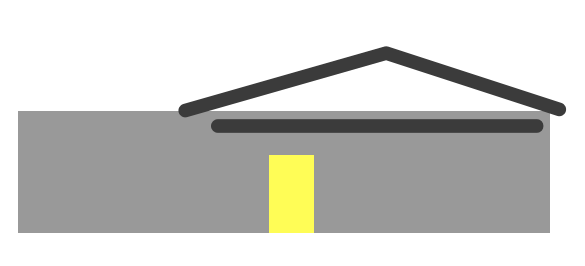
This is a rough sketch of our model and a concept sketch of how we visualize our Eichler: The body of the home, the roofline, the beam accent, and the door.
The Key Components on an Eichler: What to Paint
Start With The Three Main Color Scheme Decisions For an Eichler
Body - Everything considered the body, including garage doors, posts holding up beams, window and door trim, should stay this color throughout the home.
Beams - The beam color should extend throughout the house from the exterior to the interior, and back to the exterior.
Door - This can stand alone as a unique accent color, which doesn’t have to be replicated anywhere else on the house.
The Details of Exterior Trim Work on an Eichler
There is a lot of trim work around throughout an Eichler, and you need to adjust the paint scheme for the trim application. If the trim is in the body of the home, keep it the same color. Along the ceiling, try to match the ceiling colors. The trim is not highlighted to stand out on its own, and is painted to blend in with either the house body or ceiling.
The Details of Trim Work on an Eichler
Below is an original shot from Ernie Braun from Adamson, P. (2002). Eichler: Modernism Rebuild the American Dream. Althought black and white, it can still be used to illustrate the paint scheme.
Below is a similar model current day that has been mostly kept to its original paint scheme.
Rancho San Miguel, Walnut Creek, CA
Photo by Ernie Braun
You can see below from an original Eichler model, that it was designed in a way to maximize the feel of a free-flowing space. You can see the desired illusion that there isn’t even a glass wall in between rooms. The goal is to maintain that illusion and the trick is all in the trim!
Photo by Fogmodern
The ceilings were commonly tongue and groove planks that were bleach stained. Throughout the years, many homeowners enjoyed the brightness that a white ceiling could bring to a room, as well as enhancing the illusion that the glass isn’t even there, so many owners painted the ceiling white. Beams were also originally white, so the beams then blended in.
The shot above was taken from the interior of an Eichler looking up and outward. There is a floor-to-ceiling glass wall with a paint job that creates the illusion that the glass isn’t even there. The wood stops holding the glass pane is painted the same color as the body of the house, until it meets the wood stops in the ceiling, which matches the ceiling color.
Examining below, I’ve pointed out all the wooden stops for the glass and the siding trim against the ceiling so you can see that the trim isn’t all the same color.
Photo by Fogmodern
Here is another example (above) looking up and out where a post meets the beam. There is a floor-to-ceiling glass pane on the right that you can’t see because the wooden against the post match the post color, and the stops along the ceiling matching the ceiling color.
Painting A Conventional Home
Let’s take a look at a conventional home. Below is a classic American bungalow, where all the trim work is highlighted in white. Most painters are simply used to painting all trim white, but for Eichlers the rules don’t apply.
Original Eichler Exterior
An original Eichler shown below features a dark-stained siding. You can see there are lots of doors and windows trimmed out, yet you can’t see any attention drawn to it.
Eichler Paint Finishes
Exterior body - matte
Trim - any trim should match color and finish of its neighboring color and finish. If trim is on siding, it will in most cases, need to match the siding. (So on and so forth for posts, beams, and ceiling.)
Beams - satin (which is one up in sheen from the body)
Ceiling - if painted, can be satin to offer a level lustre to help reflect light if that’s the intended look.
Door - satin or one up in sheen to semi-gloss, which provides added protection from mildew, moisture, and wear.
The Eichler Painting Process
Step 1: Prepping an Eichler for Paint
Preparing your home requires the most time of all the steps. For us, we ripped off vinyl siding and had to refabricate a lot of the original trim, so it took about a week or two. You’ll want to:
Repair/replace any rotted trim pieces, siding, beams, doors and jams
Patch holes with putty, caulk, or wood filler
Power wash all surfaces to remove dust and debris
Patching holes, adding new trim, and patching siding.
Repairing beams.
Step 2: Masking an Eichler for Paint
Masking took a full day to cover all the windows and doors.
Step 3: Paint the ceiling and beams
For our house, the beams and ceiling were the same color and finish. We used Swiss Coffee satin finish primer/paint from Kelly Moore.
The awnings and beams painted first. (Oversight: The roof flashing should’ve matched the body color.)
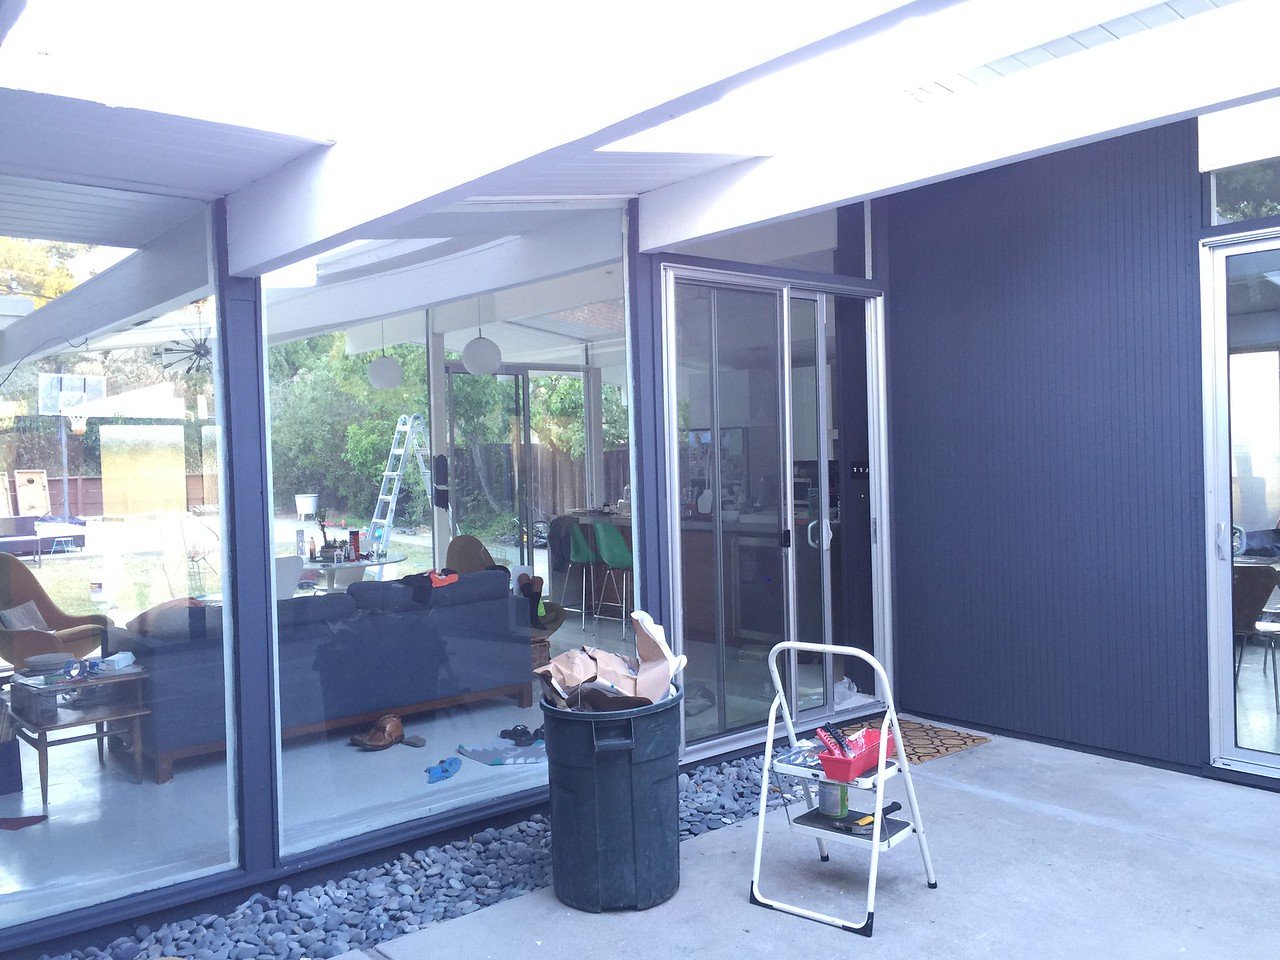
Step 4: Paint the Body and posts
We used Behr Evening Hush matched to primer/paint from Kelly Moore.
‘Cutting in’ the body area where the sprayer would risk getting too close to the ceiling.
Painting posts up to the point where brush work would be required.
Body finished.
Step 5: Paint the front door
Step 6: Remove the masking
Step 7: Install house numbers
Once you’ve made it this far, the feeling is amazing–It’s like getting a new house!
We moved onto landscaping before taking the final shot below.
The prep took two weeks, masking took a full day, and the paint took a day. We hired a local painter and directed the team of two on precisely what needed to be painted what color.
Most of it was done with a Graco professional sprayer and we used a mixture of mainly Kelly Moore, and Behr (when we ran short).


